
LIMACAPT : DOCUMENTATION/TUTOS/FAQ
You are a LIMACAPT user, this section is designed to bring you aid elements to use LIMACAPT.
If you are experiencing a technical issue, to stall, please go directly to the diagnostic page --> Click here
Product Presentation :
LIMACAPT is the first autonomous and connected sensor for detecting and counting slugs in the field. It has been specially developped to monitor pest attacks during risk periods for all crops (rapeseed, wheat, corn, sunflower).
User manual :
Click here to have access to the user manual
Our advice to the use of LIMACAPT :
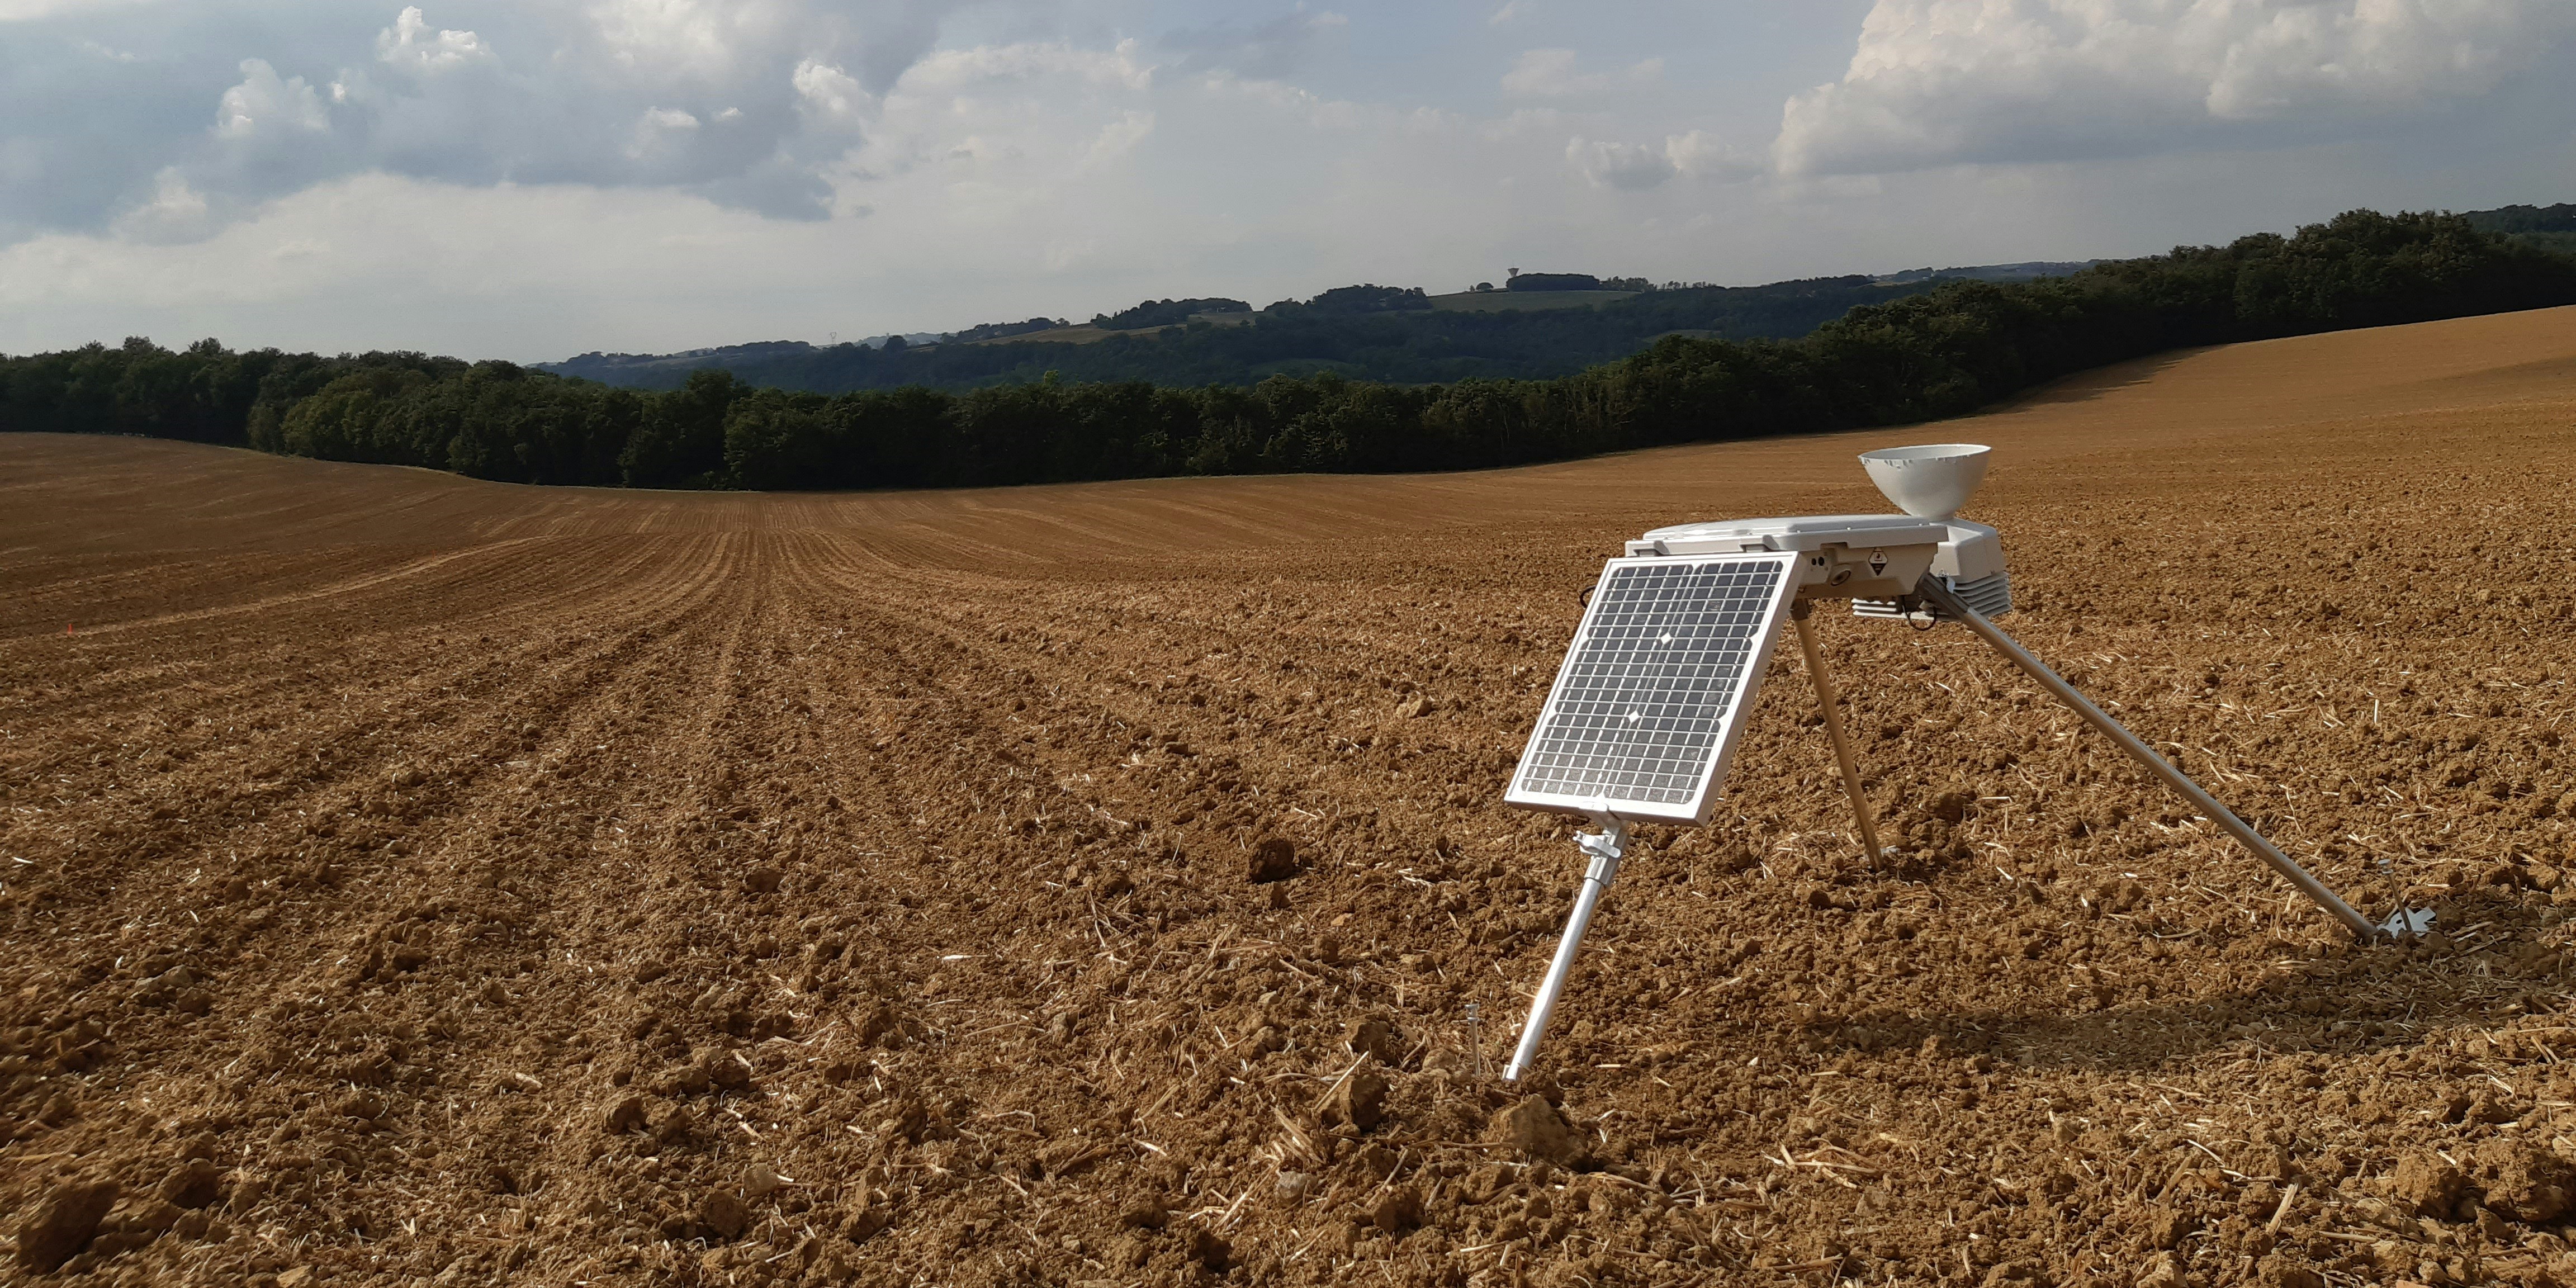
· Always orient the solar panel towards the SOUTH.
· Remove all vegetation and crop residues under the LIMACAPT.
· Keep the area under the LIMACAPT (1.30X1.30 m) free of vegetation throughout the observation period (the crop must also be cut).
· Check that there are no spider webs in front of the cameras.
· In case of heavy rain, check the cleanliness of the camera lenses and clean them with a damp cloth if necessary.
· For optimal rainfall measurements, keep the weather station’s rain gauge clean and level using a bubble level.
· Remove LIMACAPT from the field before each intervention with a sprayer.
Our maintenance tips for the LIMACAPT :
· After each deployment campaign ends, clean the electronic housing, foot bases, feet, weather station, and solar panel.
· Clean the cameras and infrared LEDs with a damp cloth.
· Do not place the LIMACAPT on a slippery surface (the base plates may deteriorate).
· Keep imperatively all LIMACAPT cardboard boxes for potential customer service.
· Always exercise great caution when handling the LIMACAPT
LIMACAPT usage videos
What’s inside à LIMACAPT box ?
LIMACAPT assembly guide
Setting up LIMACAPT in the paddock and how to properly clean the area
Using the switch on button
Turning on LIMACAPT
Turning LIMACAPT off
Cleaning recommendation in the plot
Powering up the LIMACAPT with AC cable
Taking apart the LIMACAPT
LIMACAPT Maintance and cleaning procedure
Packing away LIMACAPT into its boxes
LIMACAPT Maintenance mode
LED lights manual
What to expect when LIMACAPT battery is flat
What to expect when LIMACAPT solar panel is not connected
Rebooting the LIMACAPT
Network Connection Issue ?
Complete cleaning of the weather station


LIMACAPT service platform videos
How do I create an account on the LIMACAPT service platform ?
How to create your plot on the LIMACPT service platform ?
How to add users to the LIMACAPT platform ?
How to obtain the risk calculation and LIMACAPT intervention recommendations ?
How do I set up my pest alerts on the LIMACPT platform ?
the creation of a new culture


FAQ LIMACAPT
1- How do I assemble my LIMACAPT ?
Video explanation => Assembling the LIMACAPT (Vidéo)
Assembling the LIMACAPT requires no tools and can be done directly in the field. Here’s how :
1. Remove the electronic box from its packaging and place it upside down on a clean surface.
2. Assemble the two rear feet and the front foot using the tightening levers.
3. Place the LIMACAPT on its feet.
4. Attach a solar panel to the front foot using the two notches on the electronic box and the plastic bracket that slides onto the foot.
5. Connect the solar panel.
6. Mount the weather station on the mounting bracket, ensuring it’s level using the bubble level.
7. Attach the bird spikes to the weather station bowl.
8. Connect the weather station.
Place the LIMACAPT in an area where there have been previous slug damage.
If you are unsure about the slug history of the field, install the LIMACAPT in the are most conducive to slug activity (clayey presences, wet areas, valley bottoms…).
Yes, the LIMACAPT can be moved within the field.
However, it is recommended to leave it in place for at least one week before moving it to get a good overview of slug activity in the area.
Since the LIMACAPT is an autonomous device, it is recommended to place it 3 weeks before the planned sowing date, with a minium of 15 days. Implementing anti-slug measures is crucial before sowing, so the earlier you can decide on a control strategy, the better.
Slug activity monitoring starts at least 15 days before sowing and stops when the crop reaches the 4 to 6 leaf stage, depending on the crop.
Video explanation => Placement in the field (vidéo)
1) Clean the area (1.30x1.30m) where the LIMACAPT will be positioned (remove vegetation and crop residues) to ensure optimal data collection.
2) Position your LIMACAPT and orient the solar panel towards the south (caution : do not place it in an area that could be shaded during the day).
3) Drive the stakes into each foot to secure your LIMACAPT (Click here to see the photo).
4) Turn on your LIMACAPT (long press, short press) (Click here to watch the video).(vidéo)
5) Ensure that the weather station is level using the bubble level.
Video explanation => Turning on my LIMACAPT
You need to use the single side button by pressing it long and short.
Wait for a minute, the LIMACAPT initializes and connects.
Video explanation => Turning on my LIMACAPT
When the LIMACAPT is turned on, the LED flashes green with maximum intensity just after startup or with lower intensity if the LIMACAPT has been on for more than a minute.
Video explanation => Turning LIMACAPT off (vidéo)
You need to use the single side button by making two long presses.
After a few moments, your LIMACAPT will turn off.
Video explanation => Cleaning the scene under the LIMACAPT
During usage, with the growth of weeds or the crop, the 1.30x1.30m area will require cleaning again. To ensure optimal data collection, everything growing under the LIMACAPT must be cut.
Video explanation => Cleaning the area under the LIMACAPT
When this message appears, there are two possibilities :
- Either the area (1.30x1.30m) under the LIMACAPT requires a new cleaning. In this case, weeds or crops that have regrown in the area need to be cut.
- Or there may be spider webs on the LIMACAPT, in which case they need to be removed.
After cleaning, the message should disappear the day after.
Video explanation => Charging the LIMACAPT
There are two ways todo this :
1) If your LIMACAPT is powered on and connected, you can check the battery level on the service platform. (Always ensure that the solar panel of your LIMACAPT is facing south.)
2) If your LIMACAPT is powered off, you need to plug it in using the power cord and observe the LED behaviour.
· If it turns solid green, the LIMACAPT is fully charged.
· If it rapidly flashes red, green, and blue, the battery needs to be charged.
To plug it in, unscrew the hatch on the side and use the provided cord in the accessory box.
Note : A fully discharged battery requires a charging time of 6 hours.
Video explanation => What to expect when LIMACAPT battery is flat
Video explanation => Charging the LIMACAPT
When handling the button, the LED flashes red.
The LIMACAPT needs to be charged :
· Either using the cord provided in the accessory box.
· Or by placing your LIMACAPT in the field with the solar panel facing due south.
Video explanation => What to expect when LIMACAPT battery is flat
Video explanation => Charging the LIMACAPT
This means that the battery of your LIMACAPT is decharged. The LIMACAPT cannot turn on because the battery is too low.
The LIMACAPT needs to be charged :
· Either using the cord provided in the accessory box.
· Or by placing your LIMACAPT in the field with the solar panel facing due south.
Direct link to => « I’m experiencing a technical issue »
The LIMACAPT is in fault mode. Check the closure of the hatch, the closure of the bonnet, and the connection of the solar panel.
If, after this check, your LIMACAPT is still in fault mode, go to the « I’m experiencing a technical issue » section and select the diagnostic « my LIMACAPT is in fault mode ».
Direct link to => « I’m experiencing a technical issue »
If the solar panel is not properly connected, the LIMACAPT goes into fault mode and the LED flashes red.
Please check the connection of the solar panel (click here to see the photo)
If, after this check, your LIMACAPT is still in fault mode, go to the « I’m experiencing a technical issue » section and select the diagnostic « my LIMACAPT is in fault mode ».
Direct link to => « I’m experiencing a technical issue »
If your weather station is not properly connected, the weather data will not be sent to the service platform.
To check that the weather station is functioning properly, please log in to the service platform at least one hour after starting the LIMACAPT.
If no data appears on the service platform, go to the « I’m experiencing a technical issue » section and select the diagnostic « my LIMACAPT is not sending weather data ».
Direct link to => « I’m experiencing a technical issue »
If you did not cause the LIMACAPT’s tipping alert, go to the site and set the LIMACAPT back on its feet. It will automatically resume operation.
After this handling, if your LIMACAPT is always in default mode, go to the « I’m experiencing a technical issue » section and select the diagnostic « my LIMACAPT is in default mode ».
EThe maintenance mode allows to our customer service to directly intervene remotely on your LIMACAPT.
To activate it, use the single side button by pressing it twice for long periods, then twice for short periods.
The LED will turn blue, indicating that the LIMACAPT is now in maintenance mode.
Vidéo => LIMACAPT maintenance mode
Video explanation => « Resetting the LIMACAPT »
To reset the LIMACAPT, use the single side button.
1) Hold the button for approximately 25 seconds. You can release the button when the LED flashes orange.
2) Wait 20 seconds for your LIMACAPT to reset.
3) At the end of the procedure your LIMACAPT will turn back on (When the LIMACAPT is on the LED flashes green with maximum intensity right after startup or with lower intensity if the LIMACAPT has been on for more than a minute).
The serial number is located at 3 places (it starts with LC-000XXX) :
· Above the weather station bracket (Click here to see the photo)
· Inside the side hatch (Click here to see the photo)
· On the original cardboard box (Click here to see the photo)
Video explanation => « Maintenance of the LIMACAPT »
Use a sponge with soapy water and thoroughly clean the entire LIMACAPT (cover, cameras, infrared LEDs, feet, foot bases, weather station, solar panel, LIMACAPT contour…).
Tips :
· Do not use the green side of the sponge or any other abrasive material to avoid scratching the lenses during cleaning.
· Do not use aggressive or corrosive products.
· Do not use a water jet or high-pressure cleaner.
The guarantee period is two years from the date of purchase of the device.
Please contact customer service. (Click here)